
A Speaker's Guide to the Top 3 Tools on Stage

When you get on stage for a large event, you may see a setup at your feet that looks like a command center. This is your speaker support system, and it's designed by the AV team to help you deliver your presentation confidently and professionally.
While it may look complex, there are really just three simple tools you need to know how to use. Here’s a quick guide to what they are and how they help you.
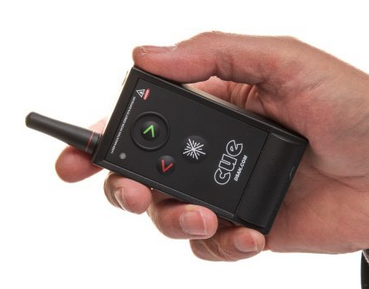
1. The Slide Clicker (e.g., "Perfect Cue")
This is the hand-held remote that gives you full control of your slides, so you don't have to say "next slide, please."
Green Button: Moves to your next slide or animation.
Red Button: Goes back to your last slide.
Black Button: Toggles the laser pointer (on most models).
Pro-Tip From Your AV Team: The clicker's receiver is not on the screen; it's usually at our tech table or on the stage. During your rehearsal, we will show you the best place to aim it to ensure it works perfectly every time.
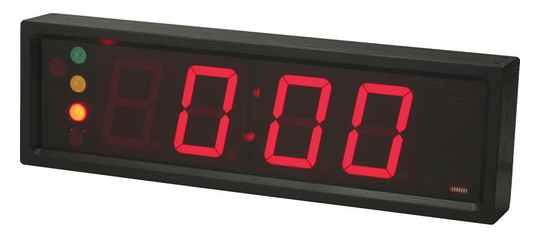
2. The Speaker Timer
This is your personal pacing tool, allowing you to see exactly how much time you have left without checking your watch.
The timer is set to count down from your total allotted time. You can usually find it on the floor at the base of the confidence monitors. We use a simple "traffic light" system to help you stay on track:
Green Light: You are good on time.
Yellow Light: It's time to start wrapping up.
Red Light: Your time is up.
3. Confidence Monitors (or "Down-Stage Monitors")
These are the most important tools on stage. They are the screens at the foot of the stage, facing you. They allow you to see your presentation content without ever turning your back to the audience.
These are NOT teleprompters for a full, word-for-word script. They are designed to show your slide content—short bullet points, keywords, and cues—to keep you on track.
(For a more in-depth look at this tool, see our full post: What is a Confidence Monitor? A Presenter's Guide).
A Typical Pro Setup:
We use a dual-monitor setup to give you the most information possible:
Monitor 1 (Left Screen): Shows your Current Slide (this is exactly what the audience sees).
Monitor 2 (Right Screen): Shows your Presenter View, which displays your personal notes and a preview of the next slide.
How to Use the Notes Feature: For your notes to appear on this monitor, you must have them formatted in the "Notes" section of your presentation file (e.g., PowerPoint or Keynote).
Final Thoughts
These tools are all part of our professional production setup, designed to support you. By taking a moment during your tech rehearsal to get comfortable with them, you can walk on stage feeling prepared, confident, and ready to connect with your audience.